Showing posts with label skillshare. Show all posts

Thursday, 7 May 2015

Branding your Creative Business


Oooooo I'm so excited! My new course is now live on Skillshare. I've been working on this course for a few months and hope it will help all those people who find the branding of their businesses a little tricky. My main inspiration for this course was meeting a load of talented surface pattern designers and many of them found the branding of their business their biggest hurdle to get started. Even as a graphic designer myself, branding yourself is one of the hardest jobs due to how personal it is.

This course will break down all the steps to creating a perfect brand. In part 1 of this course - Define your brand - we will look at:
Defining your business
Your perfect customer or client
Your brand questionnaire
Your brand name
Your brand mission statement
And writing a design brief for your logo design

Part 2 will be all about Designing your logo and part 3 will cover releasing your brand to the world! more details coming soon.

Hope you can join me on the first part! check out more details here: http://skl.sh/1EcVwaZ

Thursday, 12 March 2015

Branding your creative business - new course!

Oooooo, I'm pretty excited... I'm in the process of creating a new online course all about Branding your Creative Business - really aimed at everyone running a business in a creative field who might need a little help with their branding... This course will be launched on Skillshare in the next few months. 
I hope you can join me soon!


Thursday, 27 March 2014

Teaching an online course - top tips - Part 3

In the third and final part of my top tips for teaching an online course we look at what to do once your course is live and running. If you missed Parts 1 and Parts 2 just click on the links. (It's a good idea to start at the beginning!)
We've covered what your course might be about, how to structure the course, how to deliver the course and how to price it. But what do you do once the course is up - how do you deal with criticism, how can you improve your course for the future and how do you get people to stay interested or stay in touch? let's take a look... you'll be pleased to know this is a little shorter than the previous 2 posts!


8 - DEALING WITH FEEDBACK
Your course will be open to receiving feedback whether publicly or maybe someone will pop you a mail. I've received some lovely reviews of my course but then on one dark rainy day I got a thumbs down! I have to say, I was a bit gutted. I previously had a 100% positive response record (thumbs up!). The thumbs down person didn't leave a comment and their profile was private so I couldn't contact them to ask them why. I really genuinely wanted to know what they didn't like - so I in turn could learn from it and either make it right or carry the thought onto another course. I don't mind receiving constructive criticism, as a designer you face it quite regularly... but you have to be able to take it on the chin. So be prepared for the good and bad. You can't please everyone all of the time. Ask your students for feedback, if they all come back saying one particular thing you know that's something you need to improve on.


9 - BEING YOUR OWN CRITIC
Despite my disappointment receiving a thumbs down, I know my course wasn't perfect and there's a lot I'd do differently now. I'd probably make it shorter and more focused, I'd try to record the videos better quality. Even if you get the best reviews in the world always strive to think of ways to make the course or the way you teach better or more engaging.


10 - KEEPING IT FRESH & KEEPING IN TOUCH
So your course has been running, you've got students and all is going well... but don't be complacent. How can you keep your course fresh and keep getting people to sign up to it? Can you offer competitions and giveaways? Could you include a new video or an update? And how can you stay in touch with your students to notify them of any new courses or updates? maybe it's a newsletter or facebook page. Keep in touch with your students best you can... build on those relationships. 3 years ago I thought having online friends was a bit strange but since taking part in some courses I've made many online friends who have the same interests as me, can answer questions I have about the industry and can share in frustrations with clients and general work. Build your online network!
Skillshare is good as you can keep in touch with your students, set new challenges with prizes or direct them over to a facebook page. We now have over 200 students in The Art of Typography facebook page which is a great way to stay in touch and stay engaged.
What other ways can you reach new students? Use your testimonials as a marketing tool and use social media - twitter, instagram etc. Have your students written a blog post about the course? don't be shy... share it!


Other useful links:
Lynda.com for tutorial inspiration!


Phew... there we go - your 10 top tips! Are you ready to get pen to paper and start brainstorming your online course. Please add any comments or questions below. And do let me know if you run a course. If you decide to use Skillshare as your platform you could be very kind and use my referral link, be sure to let me know your course so I can sign up to your course! And if anyone is interested in taking my course The Art of Typography, you can grab 30% off with this link and use the code BLOGPOST. Or maybe you'd like to try out the Skillshare membership option where you can access loads of courses and see how other people do it.

I'm currently thinking of a new course, I've got the bug! To keep up to date with any updates please like my facebook page.

Thank you for reading and getting all the way to the end..!

Wednesday, 19 March 2014

Teaching an online course - top tips - Part 2

In mini celebration of reaching over 1000 students in my online class The Art of Typography, last week I posted Part 1 of Teaching an online course - top tips which you can read here. In Part 2 we will think about the best way to deliver your course, whether through video or the written word. We'll also be looking at pricing and marketing your course. And next week I'll be posting the final part (3) giving you tips on what to do once your course is up and running - dealing with feedback and keeping the course fresh... I hope you find it useful and would love to hear your thoughts on what course you would like to run.


5 - DELIVERY - VIDEOS OR THE WRITTEN WORD?
I'd advise you to take a few online courses yourself before deciding on the best way for YOU to deliver your course. Some courses are entirely made out of video posts - whether that's talking to camera or screen recording tutorials in specific programmes. Some are held on a website where new content may be released each day or week like a blog post. Some are a mixture of both. A lot will depend on your course content and your character!

Video
Videos are a great way to engage with people, or if you really can't stand the thought of recording yourself think about audio files just recording your voice over a series of relevant images or footage. I can tell you, I didn't feel that comfortable recording myself initially - everyone hates their own voice and I realised I had weird little habits when I spoke... (my nose and mouth seemed to do odd things!!) but the more you do, the better you get, the more confident you become and the more natural you sound so practise practise practise... And give it a go before you rule it out completely.

I recorded my videos using a mix of Quicktime and After Effects. Quicktime can do screen recording so you can record your screen if you are doing a tutorial, it will also record your voice at the same time. If you select Movie Recording it will record from your computers built in webcam. There are lots of other screen recording software available, like I Show U also. If you have a lot of background noise - whether that's a dog who might start barking, children or a general hum from your computer, invest in a headset - they aren't overly expensive. Although the dog and children might still be an issue! You could also set up a camera and record yourself talking - if your course is about baking, you'll want to show footage of you baking so get a friend who is handy with a camera to help.

In terms of editing your video I Movie is probably a nice easy option or something similar. Or if your delivery is perfect you might not need to edit (the perfect solution!). I used Adobe After Effects but I wouldn't recommend this for everyone. It's not the best tool for editing long videos as render times can take a while - I had a lot of additional graphics so found it useful, especially as I know the programme very well.

Try to keep any videos between 5-10 minutes. You can post a few videos for different sections but people's attention spans have decreased and like their info delivered in chunks! The maximum any of my videos have been is just over 20 minutes.

Skillshare work on a video basis - all their courses involve recording videos. But what if it really isn't for you...?

The written word
Think about how you can structure your course in the form of a blog - a new lesson posted every day or every week and everything is written rather than spoken. I've participated in courses like this that were equally as engaging as any video ones I've done, as long as it's done right! Well you are still reading this rather long blog post... but would you prefer a video of me talking? Or maybe mix it up with an audio file? Be sure to add engaging imagery to break up long text. (note to self - add engaging imagery!!!)

Just make sure it's relevant?!

The key is to keep your students engaged. Maybe set up a facebook page where people can show their projects? It's a good idea to try to get your students interacting with each other and conversing so facebook and other forms of social media might be your option... Pinterest could be a good route depending on your course content.


6 - PRICING YOUR COURSE
Do you want to make money from this venture or are you happy sharing your knowledge for free? Personally I loved the idea of teaching (I've always thought I would teach one day) but I also liked the idea of making some money out of it. You have to get the balance - if it's all about making money, you might not be a good fit for teaching! Or perhaps you think you could offer videos for free on you tube and hopefully make some money from the advertising. Work out your main reasons for doing this...

Skillshare classes (on average) cost the student $20 to enrol although there is now a membership option where you pay monthly. Please don't think I've made $20x1000!!! Skillshare take a cut, I'm always offering discount codes (see below), and I've signed up to this membership option where I make a fraction of the enrolment fee. But the time I invested in it (and still invest in it) has paid off, yes.
Other courses can literally cost £100s to sign up but then maybe the course numbers are limited and you get more one on one attention. If your course will run for a limited time, can you rerun it biannually maybe? Have you got the network to promote a more expensive course yourself? There's no point running a course costing £250 if no one signs up or hears about it.

Finally really think about what your course is worth. Some people said to me - are you selling yourself short selling a course for $20? I think the student gets a lot for their money but the bigger picture is anyone can sign up to that course. Almost like selling a photo on a stock photography site - the photo can be bought many times over. Personally I liked the concept of a site like Skillshare - affordable, accessible classes. I've also taken much more expensive courses and equally thought they were worth the money. Once you figure out the best platform for running your course on, the price will probably be easy to judge - but don't forget your research that we discussed in Part 1!


7 - MARKETING & PROMOTING
Oh yeah, if only we could all have Paris Hilton's money and contacts! This is a big subject and not an area I felt particularly comfortable with. You might be a marketing guru - hey your course might be teaching people how to be a marketing guru (can I sign up?!)... if so, brilliant! You don't need me to point you in the right direction. If you have no idea where to start, join the club... which is why I liked Skillshare. Although they don't pick up on every class they run and you are expected to do your own promoting, your course is still online at a website which gets a lot of hits. After the first 2 months I felt like I had totally exhausted my network of contacts and friends who might sign up to the course. So then you have to think of new ways to attract people - competitions offering free spots, getting a mention on popular relevant blogs, maybe even advertising in a magazine, using twitter and pinterest. Word of mouth too - will your students talk about it to friends?

So although I'm no expert in this field you need to think about it. You can create the best course in the world but if no one hears about it, no one will sign up. And don't wait until your course is launched, you need to start creating a buzz about it so you get lots of people signing up in advance!


Next week in Part 3 we will look at what happens once your course is launched. How to deal with feedback and criticism, and how to keep your course fresh. You can check it out here.


Here's some other useful links:

Check out Monica Lee from Smart Creative Women for being effortlessly natural in front of the camera. She does this week in week out - and all that practise has paid off in her relaxed style.

The online course The Art and Business of Surface Pattern Design - my first online course I took, I was hooked! Module 4 starts on the 24th March and I'm thrilled to be involved teaching a masterclass in typography.

To get 30% off The Art of Typography follow this link and use discount code BLOGPOST, alternatively sign up to the membership option for access to lots of classes including mine.

Have any of you started to think about a potential course yet? please share you ideas and thoughts below...


Wednesday, 12 March 2014

Teaching an online course - top tips - Part 1

In June 2013 I launched my first ever online course called The Art of Typography on the Skillshare platform. Nine months on, the course has reached over 1000 students. I'm pretty astounded by this and obviously very pleased with the success. And whilst I never thought I'd be one counting numbers, 1000 is pretty cool!

So in a mini celebration of this milestone I thought I'd share my experience of teaching an online course, the interaction with students and receiving feedback on the teaching. Hopefully this might inspire some of you to run your own courses as I've definitely learned and gained a lot from the experience.

This is Part 1 of my top tips. The post got a bit too long and I didn't want to bombard you with information. Points 1-4 are a really good starting point. Next week we will discuss the best way to deliver your course, videos, blog posts etc. and how to market your course.


1 - WHAT'S YOUR PASSION?
It's all well and good deciding to do an online course but for everyone to get the most out of it (including you) make sure you are passionate about it. This will show in your delivery and should instantly make your course more engaging for potential students. If you are having trouble working out what's your real passion, ask your nearest and dearest. Sometimes they know you better than you know yourself. People would ask my advice about typography without me consciously thinking that's my strong point. I just love designing in general but realised other people saw one of my biggest strengths was type.


2 - WHAT CAN PEOPLE LEARN FROM YOU?
Once you've worked out your passion you need to work out if this is something other people would like to learn and know about. Be honest with yourself - there's no point putting your heart and soul into something if you and the students get no gain from it, you want people to sign up to your course! Introduce yourself in an intro video or post. But then focus the rest of the course on what the students will be getting out of it. Use examples of your experience and work to support your teaching but be careful not to just talk about yourself, people don't really want to pay to hear all about you... unless you have some sort of celeb status - then they might!


3 - RESEARCH
This is a two step process... firstly research your topic. Are there similar courses available - there probably are! And if there isn't you need to figure out why. You've either thought of a great course which will have huge success because there's no competition or there's simply no need for your course - maybe there's lots of free videos on you tube already covering the same subject. How can your course offer more or stand apart from anything already out there?
There are now quite a few typography based courses on Skillshare. Some are very specific, maybe on hand drawn lettering or page layout. Mine is more a general introduction to all elements of typography. There can be room for everyone to succeed. Just do your research.

The second stage of your research involves your course content. You probably don't know everything or need refreshing on certain areas. I learned so much putting my course together. Particularly about the history of type - I definitely needed a refresh in that area as it had been a long time since I studied it!


4 - STRUCTURE YOUR COURSE
This is a very important step and it all depends on what you have planned for your course. Is it a short intense course that will be completed in a week with you on hand constantly to offer feedback, online chats or video calls? Or will it be a 6 week course where you devote 2-3 hours each week? will you set mini projects or one big project? will you be giving feedback to the students? Or maybe you are planning a series of tutorials? You'll have to decide whether the course will have lifetime access once signed up or whether there are set dates the course info is available. Ask yourself all these questions upfront before structuring the course content and working out how the course will be taught... videos, resources, pdf downloads etc.


So that's your starting point. Feel free to comment below, I'd love to hear your initial thoughts and ideas. Next week we will be discussing how best to deliver your course. I'd advise you to take a few online courses yourself before deciding on the best route for YOU. Some courses are entirely made out of video posts - whether that's talking to camera or screen recording tutorials in specific programmes. Some are held on a website where new content can be released each day or week like a blog post. Some are a mixture of both. A lot will depend on your course content and your character!

Useful links - some offer free classes or free trials...
www.skillshare.com
www.lynda.com
www.nicolesclasses.com

Do some research this week, start making notes and take an online course or check out tutorials on you tube. If you fancy taking my The Art of Typography course I'm offering my blog readers a 30% discount if you follow this link and use code BLOGPOST - alternatively sign up to the membership option for access to lots of classes!

Next week - Delivery, pricing and marketing your online course...

Tuesday, 18 February 2014

Valentine's Challenge winners..!

We are really pleased to annouce the winners of the Skillshare Valentine's Challenge. Majo and I each chose a winner and those lucky two are Melissa Iwai and Emma Hawman! Whilst we felt most of the designs answered the brief, we were both really impressed by the way the greeting card and gift wrap design worked so well together with Melissa's and Emma's entries.
You are both the happy 1st-place winners of some fabulous books. You can check out the prizes here.

E - I LOVE Valentine Candy by Melissa Iwai


C- LOVE confetti by Emma Hawman

To find our 2nd and 3rd places we opened it up to the public and we are pleased to announce that 2nd place goes to Sarah Price and 3rd place to Sarah H. You guys will also get a fab book each.


H - You're just my type by Sarah Price
We loved the contemporary feel to Sarah's design!


G - Love by Sarah H
Valentine's Day is usually all about pink and red, we love Sarah's use of bold bright colours in her design.


Thank you to everyone who stopped by, voted and/or commented! We closed the contest this morning at 6am (Colombian time) and had 279 votes altogether! Thank you again to all of the amazing designers that entered the challenge. You all created beautiful work and it was really hard to choose.
Melissa, Emma, Sarah and Sarah - please email us your full name, postal address and phone number. Sarah and Sarah please let us know which book you would like from these two...

Watch out for some more exciting challenges soon. And if you are interested in our Skillshare classes please check out The Art of Typography and Reign Repeats by clicking on the links.

Friday, 20 December 2013

Ho ho ho, merry christmas and to all a good night..!

A little yearly review - 2013...
I've had a really exciting year in terms of my design work... from working on some lovely branding projects, to some really cool animation briefs and also trying my hand at selling some goodies at craft fairs. A highlight this year has been launching the Skillshare class The Art of Typography. Teaching online was new territory for me and one I really wanted to do justice. I've been overwhelmed by the positive response to the class and the projects the students have been working on. And as we close the year, there's over 500 students on the course - something I never imagined saying! I do my best to offer feedback on everyone's project as I think it's really important the students get some communication between them and the teacher.


Another highlight for me was/is the amazing contributions to #adventchallenge2013. Each day I set a new theme or object for people to do something creative with. Please see the below post here to check out days 1-16. I'll do another update after christmas. 

So, that just leaves me to wish you all a wonderful Christmas and 2014. Have a jolly old time and may 2014 bring you everything you could wish for. Our biggest wish will be coming along in the form of a little sister (most probably!) for our toddler Harrison in April. Exciting times ahead!

What do you wish for in 2014? 

Tuesday, 10 December 2013

Exciting skillshare challenge!

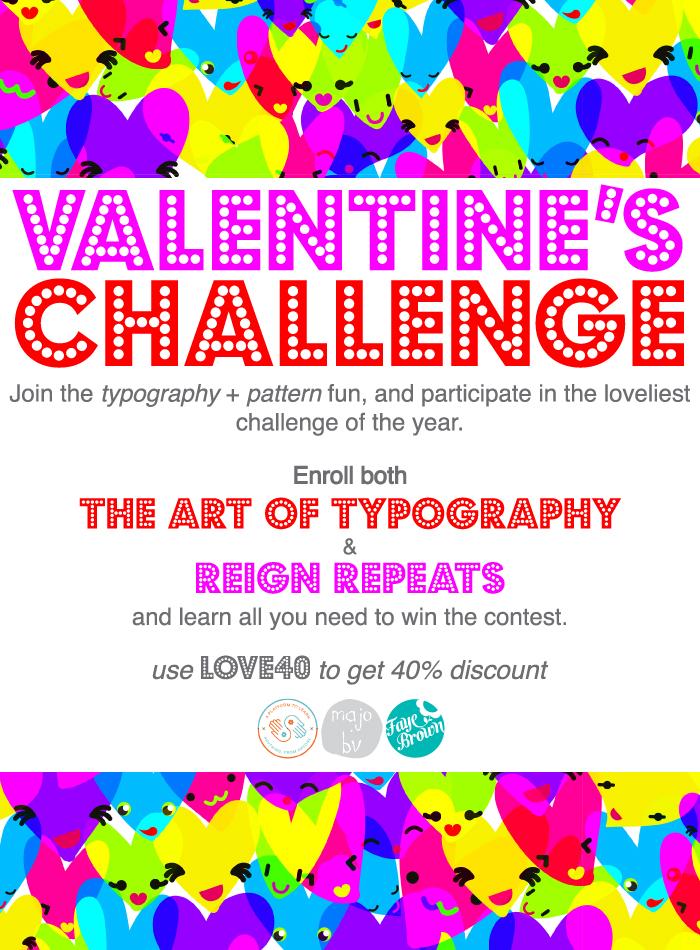
I'm really pleased to announce an exciting challenge in collaboration with my good friend, fellow designer and skillshare teacher Majo Bautista V. We are hosting a Valentine's Challenge. 


So what's the project about?
Design your perfect Valentine's card and matching gift wrap paper. Enrolling in both courses will give you all the skills you need to do the challenge!
Guidelines // to participate you must:
1. Submit your final project to both classrooms (or just one), but remember you have to be signed up to both courses to win! - use code LOVE40 to get 40% off when you enroll Reign Repeats and The Art of Typography. 
2. Create a coordinated greeting card and a patterned gift wrap design
3. Deadline: Saturday, February 8th, 2014
Majo and I will take the weekend to choose 10 of our favourite projects each. On Tuesday, February 11th we will post our top 20 on this blog and Majo's. We will award 2 first places that will be chosen by Majo and I based on design quality and overall coherence between both the card and the gift wrap. The 2nd and 3rd place will be chosen by public vote on our blogs from Feb 11th until the 17th. On February 18th we will announce the 4 winners.
Prizes:
Two 1st places will win:
2nd and 3rd place will choose their choice of these 2 books:
Each of the winners will also win a set of 4 of my typographic celebration cards:
And a free digital download from Majo's Etsy shop
Have lots of fun with this one guys!! We want to see you utilise all the skills you learn from both classes. 

Wednesday, 4 December 2013

Skillshare class - Winter Wonderland Challenge

I recently set a fun challenge in my skillshare class The Art of Typography. I asked the students to design a festive greeting card where the emphasis was on the typography. I was really surprised by the variety of submissions and found it a lot more difficult to judge than I thought I would... 


1st place
Nicola Jones of Gooseberrymoon designed this card that I chose as the first place. What caught my eye was the cheerful nature of the typography. Even though the type colour is dark it works really well against the red pattern. I also felt it could easily be extended into a whole range of wrapping paper and gift tags. Nicola received a pack of 25 of her very own cards printed. 


2nd place
I was torn between 3 designs for the 2nd place... What impressed me most about Mel Paul's (from The Original Thread) design is the process and message. Sometimes, as a designer, I find myself lost for words but I really like the sentiment of the wording here. And also the process Mel went through to design this card. As you can see in the image below she cut out all the lettering to make a stamp. I'm amazed at how well she did this and keeping the kerning in order!
Mel wins a pack of 10 of her cards printed.


As you'll now see from some of the designs below, it was a difficult choice judging!


This stunning card from Bonnie Peters would make a perfect christmas card. Whilst I really liked the hand drawn lettering what really catches my eye with this card is the fabulous photo (that Bonnie took herself). 


I love the simplicity and simple messaging of this design by Danielle Perry. I think it could easily be made into a set of 4 cards using a similar style. Great work Danielle!


Another fun design from Hande Karaaslan. I can see this working on gift tags too. 


This joyful design by Liz Perez used a nice approach of mixing English and Spanish. I wonder if it could be extended to include some more languages.


Happy Holidays by Mark Morris was my husband's favourite (he's a designer too!). I love the way Mark got the word Happy to act like a ribbon around the word Holidays. 


Since launching the course I've found it fascinating to see everyone's different styles and when I saw Mei Ling Chan's design above my eyes really lit up! I think it's such a unique approach to a Christmas card, and whilst it might not be to everyone's taste there's a whole market who would absolutely love this design!


I love the way Sara Fabbro incorporated a Christmas tree shape into her message using hand drawn lettering. Great fun!


I think Sarah Book chose some perfect typefaces for her striking design. I can really imagine this on the shop shelf along with a few more designs in the collection. 


What's your favourite design?
I'll be holding another challenge soon in my class. If you would like to sign up I'm offering 25% off with the code XMAS25, so you can learn all about The Art of Typography for only $15 (about £10). 

Tuesday, 29 October 2013

The Winter Wonderland Typography Challenge


As part of The Art of Typography skillshare course I have set a Winter Wonderland challenge. Simply design a seasonal greeting card, Christmas, new year etc that is mostly typographic. I'll be selecting 2 winners - first place will receive a 25 pack of your winning entry design printed on greeting cards. Second prize - a 10 pack of your winning design printed on greeting cards. Top 10 designs will be featured on my blog.
For more information follow this link, sign up to the course and click on the Upcoming Event on the right of the page. 
As it's almost Christmas I'm also offering the first 100 people to sign up with the code 50FOR100 50% off the price of the course, making it only $10!! 

Sunday, 2 June 2013

The Art of Typography - taster!

With just under 2 weeks to go until my online course The Art of Typography kicks off I thought I'd share a little taster of the course with you.
In the fourth unit - Creating your own typeface, we look at a variety of ways of designing your own typefaces from digital apps to hand drawn to using mixed media. But firstly I encourage the students to really understand letterforms and their structure - from stroke widths, weights, x-heights and style. A great way to start doing this is by 'copying' existing letters. I should say copying in design is not something I encourage in anyway share or form but this is slightly different!
So start by either printing out this alphabet sheet that uses a variety of typefaces or simply try drawing them by eye. 


Once you start really looking and taking the time to analyse letters you'll start understanding them more.


Above are some of my sketches. Don't worry if yours aren't quite so neat, this isn't a competition to see who can draw the neatest letters! Try to see shapes within the letters and how the stroke widths relate to different parts. Make any extra sketches to help you do this like I've done on the 'n' and 'v'

In the course we then go on to create our very own letters and typefaces. To find out more information on the course please follow this link. And if you think you'd like to enrol use discount code ALPHA for 15% off. The course will be online forever from the 14th June and I'll be giving feedback during the first 3 weeks of it's launch. Hope you can join in the fun!