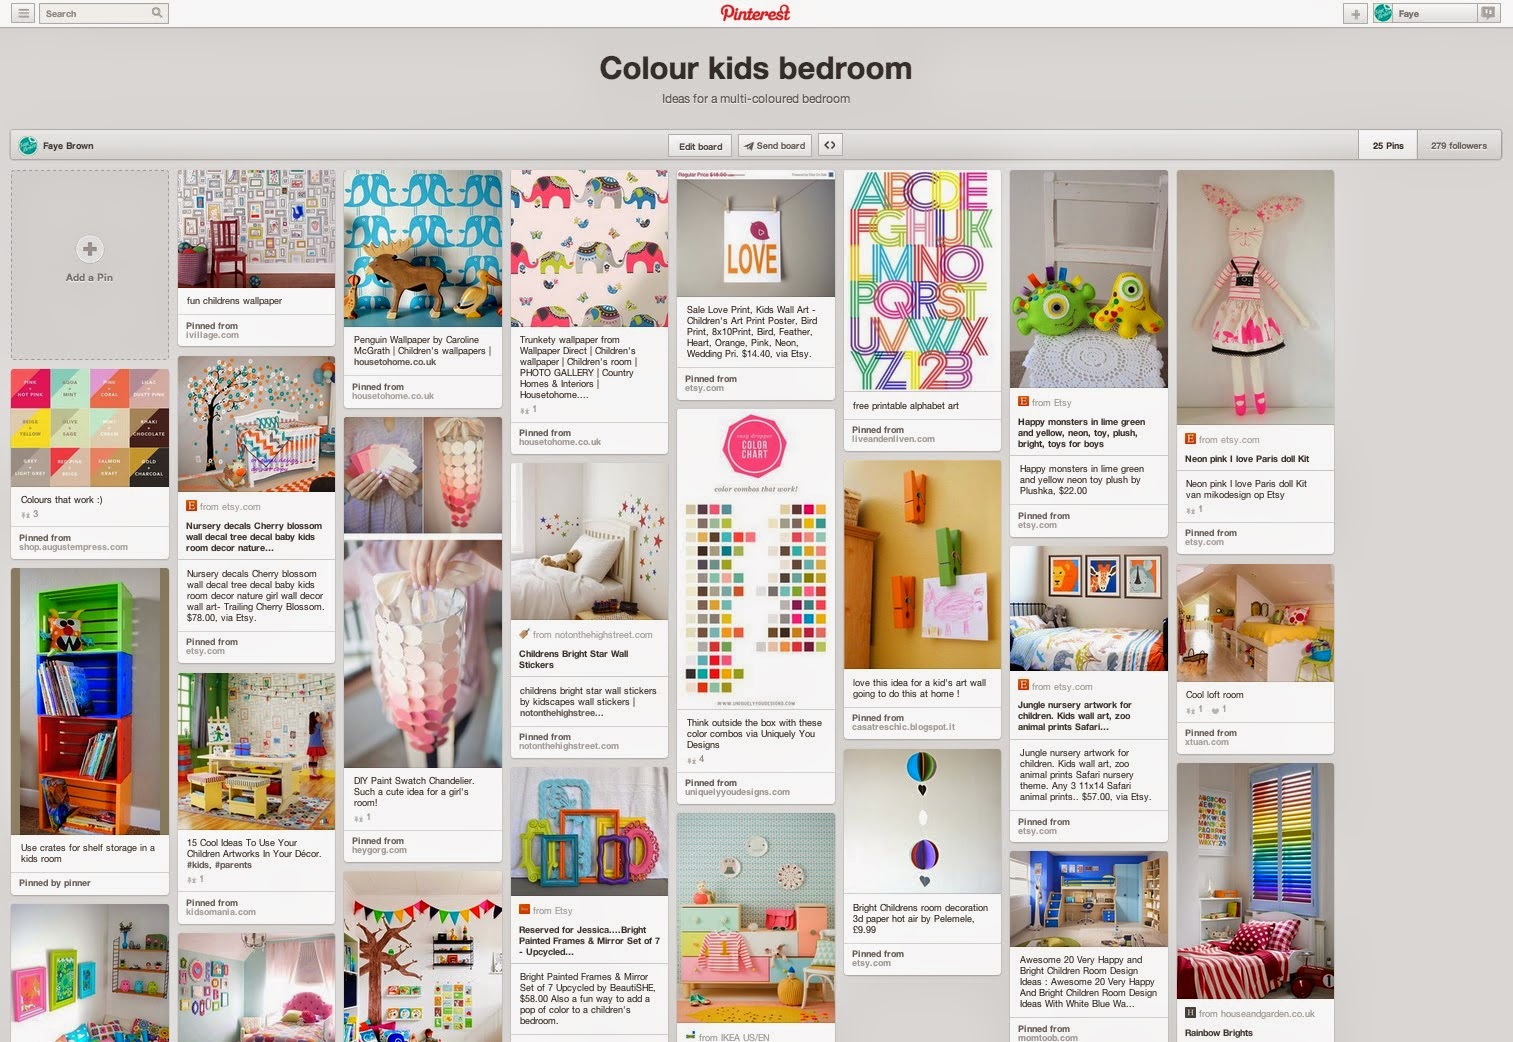
In the third project of Summer of Design we will be looking at Interior Design! Haven't you always wanted to redesign your bedroom? well now is your chance...
Project #3 - INTERIOR DESIGN
You will need - if you have access to a computer you can do a lot of this online. But if you find yourselves at a hardware store pick up paint swatches / catalogues and wall paper samples - anything you can get your hands on!
Intro
Designers come in all shapes and forms
and interior design is another big industry and career. This week you
are going to 'pitch' an idea to your parents / grandparents or
friends. They will be your client.
The project
Pick a room in your house or a friends
house that you would like to redesign. It might be your own bedroom
or might be the kitchen or the bathroom. Your job is to come up with
some ideas and designs for that room and then pitch them to your
parents / friends. We will break this project down into steps – all
these steps are part of a process you would take with most design
projects.
Step 1 – Create the brief
Once you've decided on a room answer
the questions below. You may need to ask your 'client'
these questions.
* What's wrong with it at the moment?
* How would you like to feel in this
room? (example - homely, warm, playful, fun, fresh, calm, hungry,
cool)
* What colours do you think would help
make the room feel this?
* What furniture is needed in this room?
* How would you accessorise this room? curtains? cushions? wall art?
* Any other thoughts or ideas that come
to mind?
Step 2 – Moodboard and ideas
Look on the internet and in magazines
and start collating the ideas that grab you. Think about what colours
your room should be. What furniture would work well? A great website
for finding inspiration and creating online moodboards is
www.pinterest.com
It's good to have an idea of what you are looking for before searching. So if you search 'bathroom' you will get all sorts of bathrooms. If you search 'monochrome bathroom' you will have narrowed down your search to a more specific requirement. Don't pin everything you see!! only what you really like or feel could work within your project. Also don't be too narrow in your search - so for monochrome bathroom you might also search - monochrome art, monochrome patterns, black and white photography etc.
Start collecting physical items too,
next time you go in a hardware shop pick up paint swatches and
wallpaper samples – and the catalogues or magazines for accessories like
cushions, pictures, vases etc. Or take photos of items you like in shops.
Create either a digital moodboard like
the ones above or create a physical one like the one below. This approach is especially better for younger children. Encourage them to cut things out, placing patterns and colours next to each other to see what works.
Physical mood board for a baby girls nursery.
As you can see these don't have to be works of art. You can help younger children explore colours. In this example it's quite obvious the dark grey jars against the soft pink and lilac tones - talk to your younger children when creating mood boards like this and ask them what colours they think go well together.
If you are finding yourselves getting stuck for colour inspiration - check out this fabulous website
Design Seeds.
Step 3 – Time to pitch
Set a time for your pitch meeting, sit
down and pitch your ideas and moodboards to present to your 'client'. You need
to convince them this room needs this makeover. Take a note book and write down thoughts that were discussed in your meeting. Ask your client for
feedback, maybe you can go and add to your ideas or change certain things.
Step 4 – Budget
In a real life design project you would
probably have been given a budget upfront to work to... but if you
get to the point where your client is considering the make over for
real, it's a really good exercise to work out a budget – how much
does paint cost? How much wallpaper will you need? This is particularly good for older children to work out the maths behind it all. This is usually an area most people assume designers are not great at, but you'd be surprised how much us designers use maths!
And if your client
decides to go for it – great!! make sure you help in the process as
much as possible and get your hands dirty.
What are we learning here?
This is mostly a fun project to get you excited about interior design and colour but there's a lot to learn within this brief... from the importance of mood boards, how to present to a client and how to budget. I've used all these skills in almost every design project I've worked on from designing a logo to title sequences.
For those of you who would like to know more about colour theory you'll find some good links here on my
Colour Theory board. And for some inspiration on colour combination you can also look
here.
Liked this project?
There are lots more rooms! or if you are looking for a mini project to add on to this one, why not think about designing a print to hang up in the new room? There's a few examples in the pinterest mood boards - have a go at designing your own wall art! Maybe you could look at incorporate something from
Project 1 or
Project 2 into a print...
Modifications for younger children...
This is quite a grown up project. For younger children approach this project as a fun way to explore colour and pattern. By placing cut out paper next to each other. Another fun option is to create some art for their bedroom. My son and I had fun recently cutting up all his old Thomas the Tank engine magazines and making a Thomas collage for his room (this is a great way of getting rid of all the magazines too!)
Keep updated
If you would like to be kept updated with the projects please like my
facebook page and I'll be posting reminders there. I will also let you know what materials might be needed for the following weeks project.
Also if you would like to send me any of your projects to feature on my blog please email them to me hello@fayebrowndesigns.co.uk with the subject SUMMER OF DESIGN